Paleontologist Messy Play Kit Guide
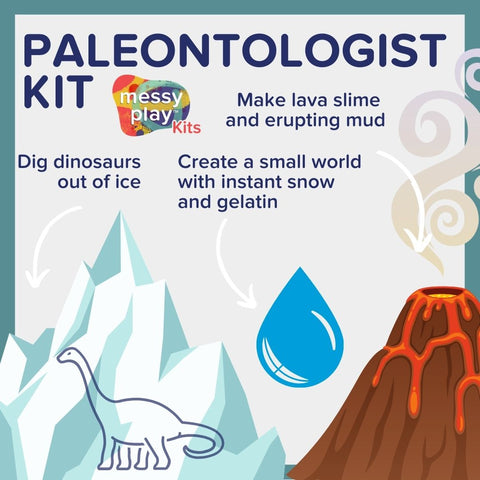
Ready to dig into your Paleontologist Messy Play Kit? On this page you'll find detailed step-by-step instructions, ideas to extend the learning, and some links to other resources. Feel free to reach out if you have any questions about your kit. Now go get messy!
Jump To:
Lava Slime
Fizzing Mud
Small World
Ice Excavation
Additional Resources
More Messy Play Kits
Lava Slime
1. Empty the bottle of clear glue into a small mixing bowl. Don’t worry if a few drops are left in the bottle.
2. Add both the powder and liquid “slime color” to the glue, and mix until thoroughly blended.
3. Add one tablespoon of warm water to the glue mixture and stir. Add one teaspoon of the liquid starch to the glue mixture and continue to stir. You’ll see the mixture start to coagulate. Continue to mix. Continue adding the liquid starch one teaspoon at a time, stirring to fully incorporate it as you add. You won’t need the entire bottle of starch. You’ll see the mixture start to pull away from the bowl and stick to itself more and more.
4. Touch the slime now. If it’s still sticky, continue stirring in liquid starch until it comes together and stops sticking to your hands (about half the bottle). When the slime doesn't stick to you, it’s the right consistency! It should stretch and droop, but not be sticky.
5. Now enjoy it! Play with the slime- bend it, stretch it, let it drop but catch it before it hits the floor! This special thermochromic slime changes color based on temperature (around 85°). Try warming it in your hands or placing it in the fridge for a few minutes to see what happens. You can even microwave it for 5 seconds to see the color change, but remember it may be hot.
|
Note: Slime is made of entirely washable ingredients, but it will stick to clothing, skin, and anything else it touches. It sticks to itself well, so use that technique for getting it off your hands. Be careful not to get it on carpet or other non-machine washable items, because that would require lots of hand scrubbing! |

What are they learning?
- Science: How does the color change work? The powder pigment you added is thermochromic, which means the color changes as it gets warmer. In this case, the red powder pigment disappears, showing only the yellow liquid you used (which is permanent).
- Fine motor control and self-help skills: Squeezing pipettes, unscrewing caps, pouring and mixing are great for this! And squeezing and stretching slime are excellent for building fine motor muscles.
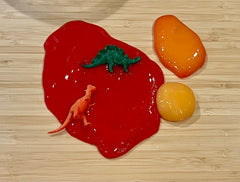
Fizzing Mud
1. Empty the bag of baking soda into a bowl. Add the pipette of mud color and 2 tablespoons of water, and stir to mix.

2. When the baking soda mud is brown throughout, scoop it out of the bowl and place it on a tray (a baking tray or an art tray is ideal- something with an edge).
3. Dissolve the citric acid in 1 cup of warm water.
4. Using the empty pipette that held the mud color, squeeze some of the citric acid solution onto the baking soda mud. Watch it bubble and erupt!

5. Before you fizz the entire thing, be sure to touch and play with the mud! Can you shape it? What does it feel like on your hands? Is it warm or cold? You can add a bit more water to make it more of a liquid too.
6. Bring out the dinosaurs to play in the mud too!
7. Keep fizzing! Use the pipette or another scoop and keep fizzing until all the mud has disappeared!

What are they learning?
- Science: This is an exciting chemical reaction! You’ve mixed an acid (citric acid) and a base (baking soda) together with water, which creates carbon dioxide gas. The gas is what bubbles up and creates all the fizzing fun! This is also an endothermic reaction, which means that it will feel cold as the reaction is occurring (yes, it’s safe to touch!).
- Fine motor control and hand-eye coordination: using a pipette to drip water on top of the mud takes fine motor control and hand-eye coordination to get the water to land in the right spot. Great practice for holding a pencil!
- Cause and effect: There is an immediate reaction when citric acid is squirted on top of the mud, and it’s easy to notice. This helps build a foundational scientific concept of cause and effect, where one thing is the reaction or effect of another.
Small World
1. Make the instant snow: empty the instant snow into a large bowl, add about 1 cup of water, and watch it instantly puff up and become like real snow! Add more water if needed- you can watch the powder expand and add water until it’s completely expanded.
2. Make the gelatin: empty the gelatin into the aluminum tin, and add 1/8 cup of cold water to help the gelatin soften. After 1-2 minutes, fill the rest of the aluminum tin with warm water and stir to dissolve the gelatin. Cut the tip off the top of the pipette of gelatin color, empty it into the gelatin mix, and stir. Place the tin in the fridge for at least an hour to set.
3. When the gelatin and instant snow are finished, you’re ready to play with your small world! You can set it up on a tray, inside a plastic tub, or even on the floor of a dry bathtub! What can the gelatin, snow and dough be? (I like to think of the snow as the “water” or “ocean,” the dough as the “ground,” and the gelatin as a “swamp,” but it can be whatever you’d like!) Add the dinosaurs and play!
(Note: the photos show waterbeads but as of 2024 the Kit ships with instant snow instead of waterbeads)


4. Can you build the dough into a volcano? How many dinosaurs fit into the gelatin swamp? Can you scoop the gelatin out of the tin and squish it with your hands (or the dinosaurs)?

|
Note: To keep the dough lasting longer, avoid getting it wet with the snow or gelatin. Clean up: if the dough has gotten wet, it’s better to toss it. If not, put it back in the jar and keep it for other uses! The instant snow can also be stored and reused (it can be dehydrated and hydrated again!), and the gelatin should be tossed out. . |
What are they learning?
- Open ended sensory play helps build motor skills, hand eye coordination, problem-solving skills, basic math concepts, and so much more! Children learn through actively exploring their environment, so give your child some kitchen utensils and let them explore and dig and see what they can do with the dinosaur small world!
Ice Excavation
1. Place 2 dinosaurs in each plastic container, and fill them up with water. Don’t overfill them or it will make it too hard to carry them to the freezer!
2. Cut the tips off the pipettes of ice colors and squeeze one color into each container. Rinse and keep the pipettes.
3. Place the containers into the freezer overnight or until solid.
4. When they’re frozen, pop each ice block out of the container and place onto a tray.

5. Excavate the dinosaurs! How can you dig them out? What if you drip cold water on top with a pipette? What if you drip warm water on top? One really interesting way is to sprinkle salt on top of the ice. (If you do this, watch carefully what happens when the salt touches the ice- it melts tunnels and crevices through the ice, which look even more interesting in the colorful frozen block! See the second photo below). Another fast method would be to place the ice block directly in a bowl of warm water.


What are they learning?
- The scientific process: science is all about making hypotheses (predictions), testing those hypotheses, making observations, and drawing conclusions. Try to have your child think about how they can excavate the dinosaurs the quickest. Grab a timer and a piece of paper and document their thought process and any observations they make. Try a different method on each colorful ice block, and see which method worked best!

- Vocabulary: “excavation,” “hypothesis,” “observation-“ these are all large words that might be new to your child. Explain what they mean (look it up if you need to) and try to use them periodically throughout the activity to help reinforce the learning.
- Fun: this activity is so simple and so fun! Kids typically enjoy this one a lot, and there are so many ways you can tweak it. Freeze toys in muffin tins and drop them into the bathtub. Bring them outside to the sidewalk on a sunny day. Freeze a large pie tin with yarn, pompoms, and google eyes in it as an “ice monster.” Have fun tailoring it to your child’s specific interests and your lifestyle.
More Paleontologist Play!
There are so many ways to continue learning about dinosaurs. Here are some of my favorites.
- Check out the Dinosaur Dig Messy Play Kit. This Kit is always in stock and is our best-selling Kit! Hatch dinosaur eggs, erupt a volcano, and make dinosaur fossils! Or check out our Sensory Bins (we have two Dino-themed bins: Dinosaur Excavation and Jurassic)- these aren't always in stock but occasionally you can find them for sale!
- Check out Wolfe and Scamp's amazing Dino hoodies and t-shirts! They're available in so many sizes and colors, and you can even customize them!
- Build your own dinosaur from recycled plastic bottles with Projects for Preschoolers.
- Make your own DIY Dinosaur custom for Halloween or just for daily fun. Check out these 15 ideas listed on Good Housekeeping!
If you liked this Messy Play Kit...
